Boatyard | Greyhawk | latest | next | 2007-05 | previous | oldest
GREYHAWK's Refit
May 2007 Update
A month ago, I had hoped to have the decks all painted and be starting on hardware installation at this time, but those hopes were just TOO optimistic.
There really are a lot of details to be attended to in preparing for paint!
Here's an update on some of those details that have received attention over the past month:
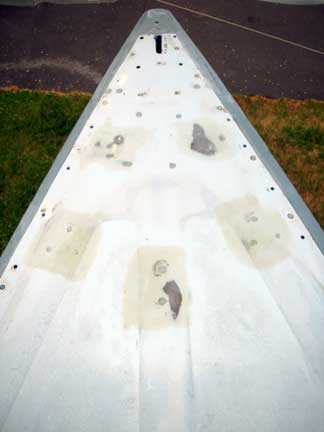
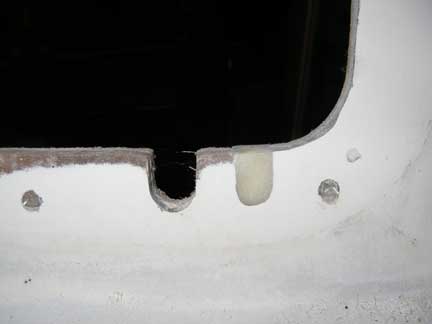
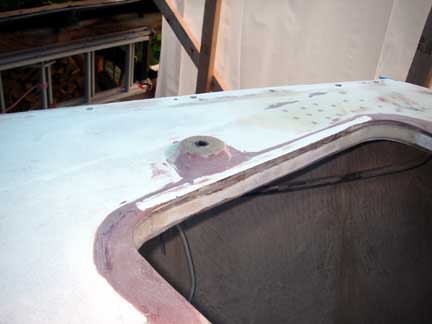
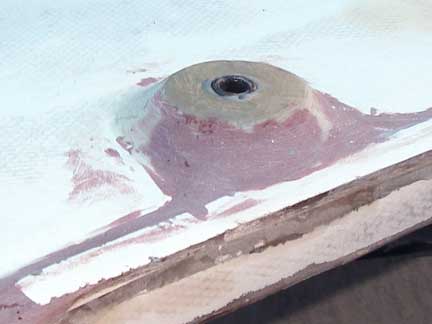
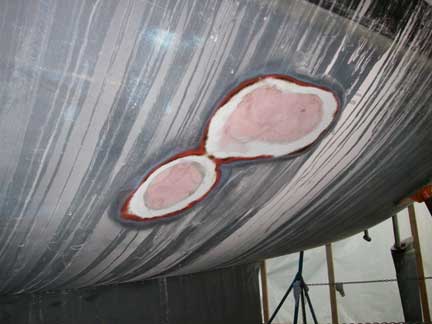
(a) Sealed and reinforced a number of holes on the foredeck, particularly where the bow pulpit attaches:
(b) Finished off the corners of the forward hatch "wavestopper" and have faired in the join to the deck:
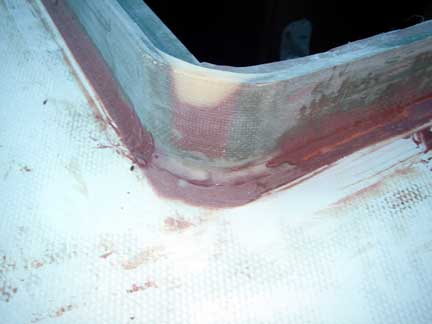
It may look a bit ungainly now, but once it's painted and the hatch itself is installed, I don't think it will look so out of place anymore.
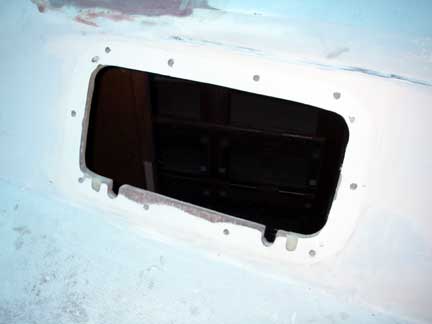
(c) Modified the cut-outs in the cabin sides for new opening ports, which are of slightly different dimensions than the old ports:
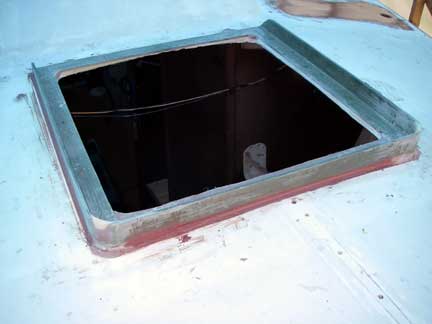
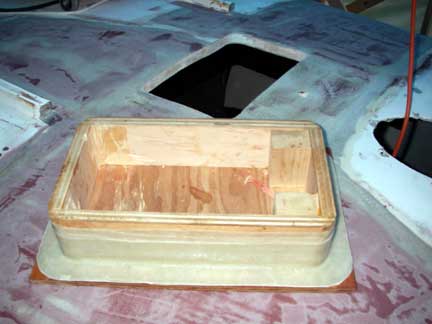
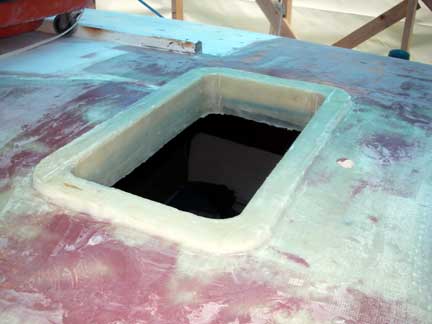
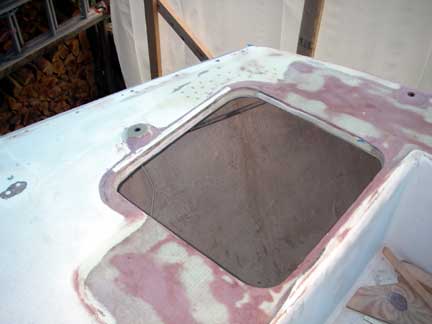
(d) Molded and installed a flange to accommodate the new ventilation hatch in the cabin top. The purposes of this flange are to provide a level base for installing the ventialation hatch, to give a more attractive lining opening through the deck and overhead, and to help seal and protect the exposed coring in the deck around the opening.
I built a mold for the flange out of plywood, covered it in epoxy, and then waxed it before doing the layup of the flange:
Still, I had to de-construct the mold in oder to get the flange free:
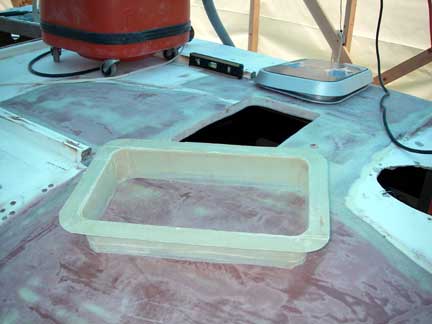
Here, it is dry fit into the opening. You can see the Lewmar Ocean series hatch in the background:
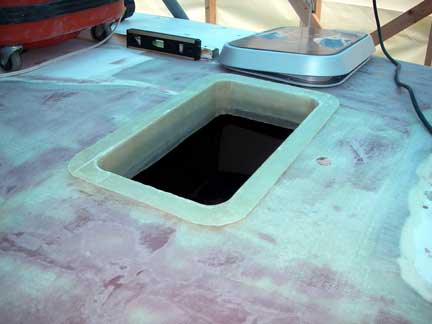
And finally, epoxied in place, with all gaps filled:
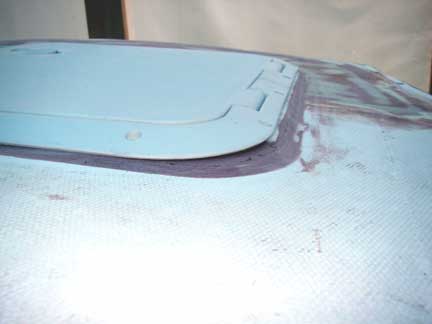
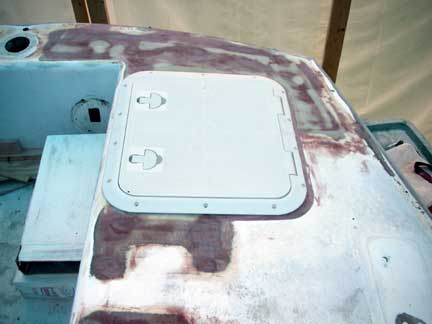
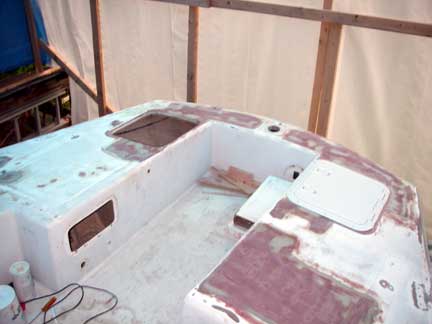
(e) In the process of fairing the aft decks and areas around the new lazarette hatches, I had to build up a rim around part of the hatch openings, to account for the crown in the decks so that the hatches would remain flat:
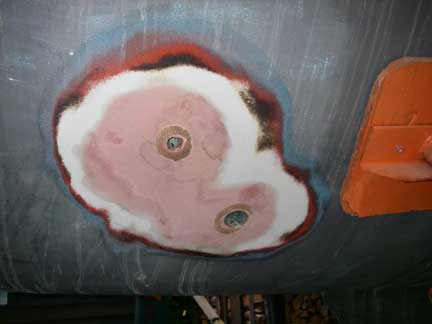
(f) On the starboard side, I had to relocate the socket fitting for my ST4000 Tiller Pilot. This was originally set into the deck just about in the middle of where the hatch opening is now. So, I had to move it outboard 10" (adding 10" of extension rods to the arm of the Tiller Pilot). But I had to raise the socket up off the deck as well, both because the deck is slightly crowned and to accommodate the height of the hatch that would installed there. Here's what I came up with (based on a disc of 1/2" G-10 left over from making my seacock backing plates):
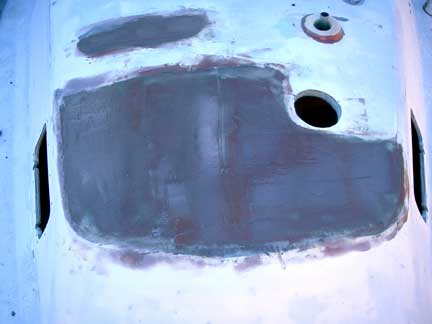
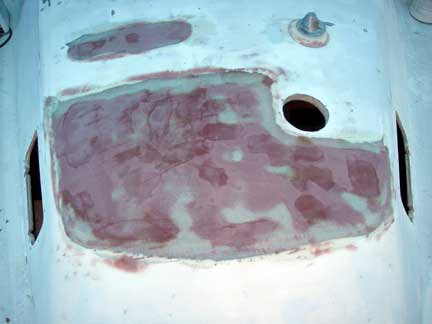
(g) As I showed you last month, I had moved the thru-hulls for the head. Now, I've just about finished fairing them in (and fairing in their old holes). I also completed re-installation of the engine intake seacock with a new g-10 backing plate epoxied in place. (I had left it out when re-installing the other seacocks back in April, as I wanted to scrub down the engine compartment, and the wash water could drain out the hole for the intake seacock more easily without the backing plate in place).

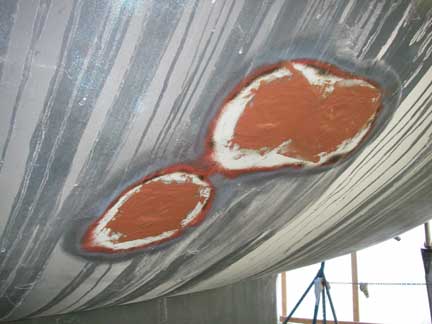
This fairing business takes several applications to get all the hollows filled, doesn't it?
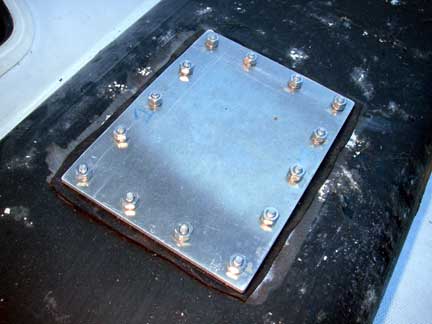
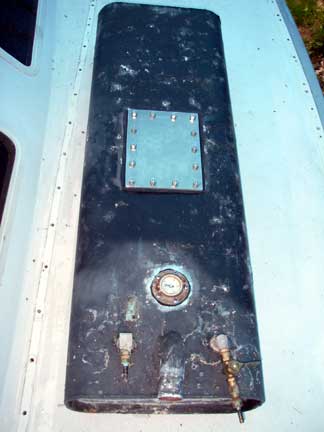
(h) In between various fairing projects, I also finished machining the cover plate for the access hole I had cut in the top of my diesel fuel tank, and got that installed.
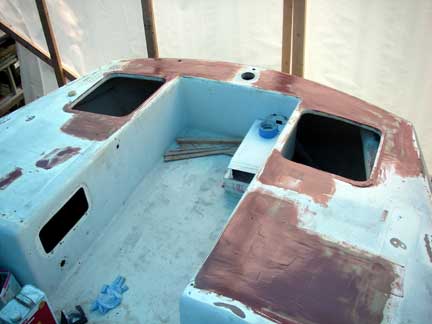
(i) The biggest task has been fairing and sanding, fairing and sanding, and fairing and sanding, all the areas on the deck that I had opened up for re-coring. I still have a round or two of fairing and sanding on a couple of the areas before I think I'll be ready to try putting down some primer to see how it all looks.
Not shown, but I spent a good day or three just washing the decks, scrubbing with a stiff wire brush. Quite a lot of dirt came out! And it could use another wash, still! I also scrubbed down the engine compartment, and the locker where the fuel tank goes (it was basically black with grunge, now it's kind of tan -- not quite white, yet).
A whole day was dedicated to removing old bedding, including the silicone around the old plastic ports; I used a lot of BoatLife "Release," a sharp chisel and a lot of elbow grease...
I spent another whole day just drilling out old hardware mounting holes on the cabin top and filling them with thickened epoxy! I also took apart the counter and cabinets in the head compartment so that I will be able to fit the new holding tank in (once I've built it!).
Last month, I had still been holding out hope that we would be ready to launch in early July.... But we're going off on vacation with the Mother-In-Law the last week in June, and then we'll be crewing on another sailboat delivery from Annapolis to Maine the first week in July, and given my desire to make sure I've dotted all my i's and crossed all my t's before putting paint to the decks (etc...), we've pretty much decided to not launch GREYHAWK this year. So we'll be re-commissioning QUASAR, our San Juan 21, for our sailing fix this season instead. Work will continue on GREYHAWK's refit throughout...