Boatyard | Greyhawk | latest | next | 2006-10 | previous | oldest
GREYHAWK
October 2006 Project Update
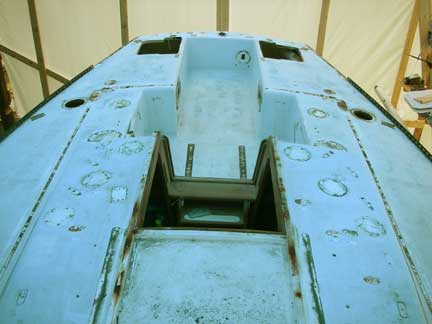
I have finally stripped all the hardware off Greyhawk's decks (except toe rails, shroud chainplates, and a very few other last items). Note that these photos have a blue overcast color due to the blue tarp covering of the boat tent; the decks are really a dirty white to grey color.
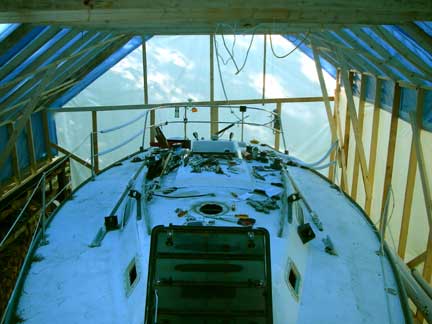
Before
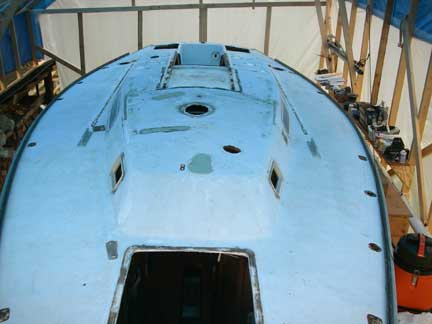
After
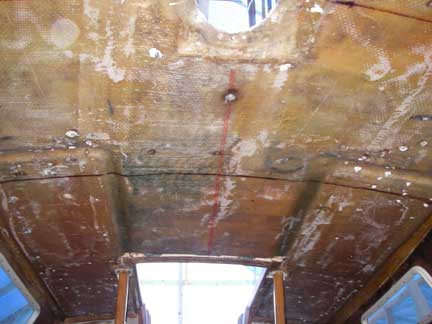
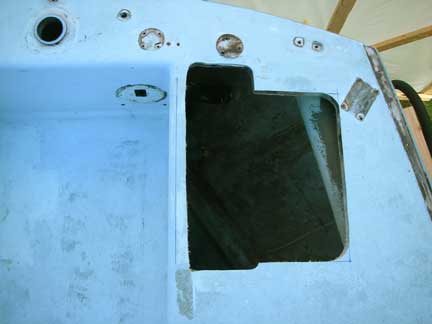
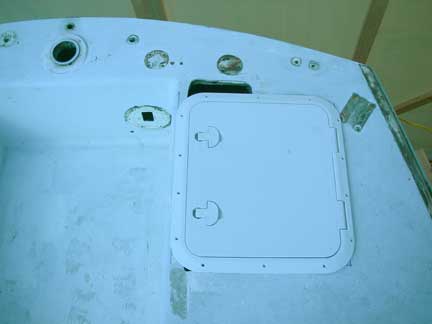
Looking aft from
amidship. The large holes in the back are for Lazarette hatches. The round holes to the sides
are for the deck-mounted compasses.
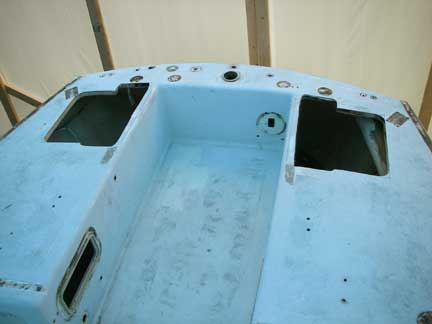
Looking foreward
from amidship. The green spots are the previous owner's attempts at
repairing bad coring. The hole in the foreground is the mast partners;
there's also the hole I cut last spring for a solar ventilator over the
head compartment.
Taking all the hardware off required pulling down the overhead to gain access to the underside of the deck. In the main cabin this was not an issue, as the vinyl was falling apart anyway; but under the side decks it was still in good condition so pulling that down was a little heart wrenching. The backside of the fabric was just a bit moldy though, and I did need access to the underside of the decks, so it had to be done. I'm not sure yet how I will replace the overhead, but it will probably involve easily removable panels instead of what was there before.
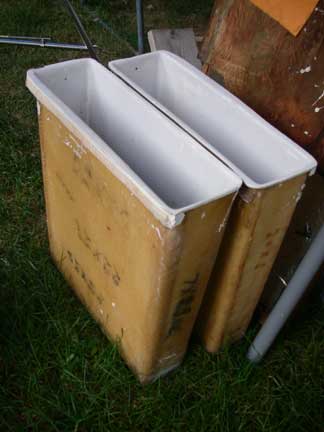
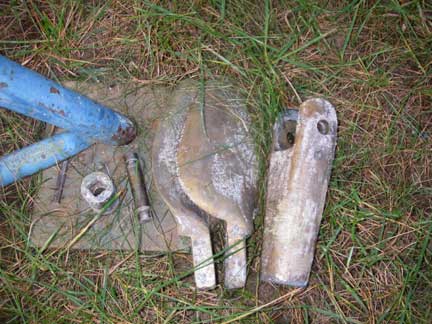
All the hardware is now on a shelf on the side of the boat tent:
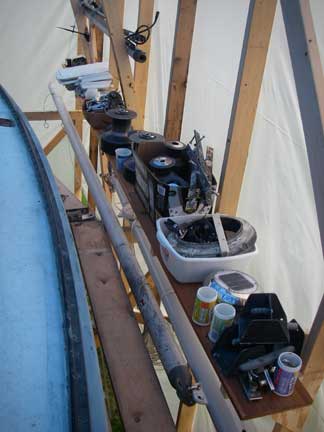
Over the winter I'll overhaul all the winches and clean up all the hardware bits before re-installing things next spring after re-coring and re-finishing the decks. Now I've got to get to work mapping out the areas of bad core!
The toe rails will come off when I'm ready for paint, but in the meantime I'll leave them on to keep my tools (and me) from rolling off the decks. I haven't decided yet whether to pull the chainplates out (again) or just work around them (I just installed and bedded new chainplates last March). BTW, the headstay and backstay chainplates have been pulled for inspection, replacement if necessary (or just polishing), and re-bedding.
The big holes in the aft deck are where I plan to install hatches to access the Lazarette space. Originally there were "wells" here for storing man-overboard horseshoe buoys. I cut out the wells, and then layed out and cut openings for hatches:
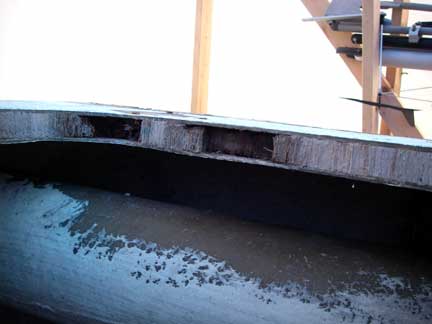
Much of the deck in this area had rotten core anyway:
It will be really useful having access to this previously un-used space, although it will still be really important to keep the weight out. But for fenders and dock lines, it will be great.

I'll have to fill portions of the cutout for the wells, which were longer than the hatches I bought, but I can use some of the good deck sections from the hatch cutouts to do that. For now, the hatches are just layed in the openings so you can see what it will look like.
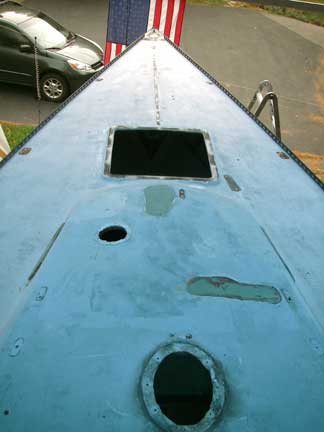
One of my projects will be to design a new bow fitting with anchor roller(s) and dock line chocks. This will be challenging because of the very narrow pointy nature of Greyhawk's bow:
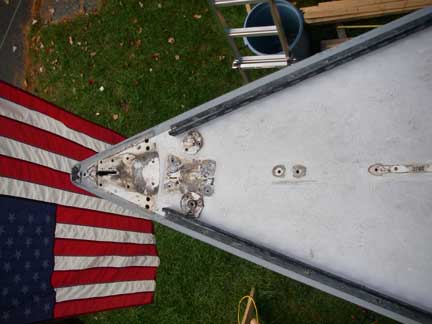
The slot is where the headstay chainplate comes through the deck.
Propellor Shaft Projects
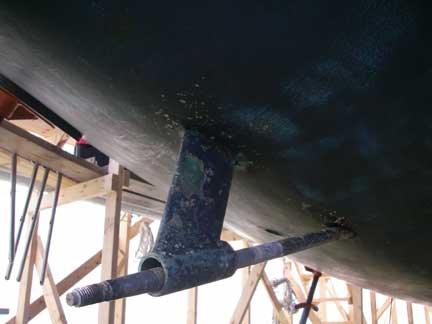
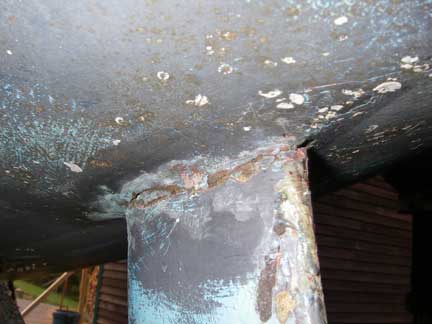
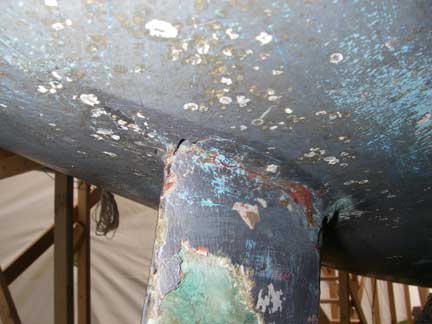
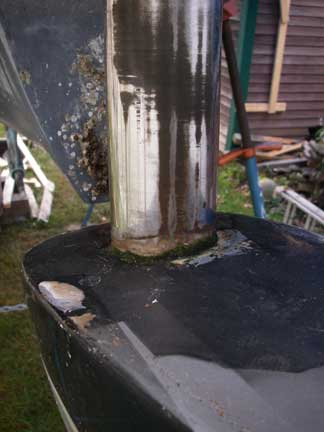
One of the issues to be dealt with is "re-bedding" the propellor shaft support strut. When the shaft is spinning, water seeps in around the strut and through the support structure inside the boat, which looks like this (BTW, the gate valves for the cockpit drains will be replaced, and the thru-hulls need to be re-bedded too):
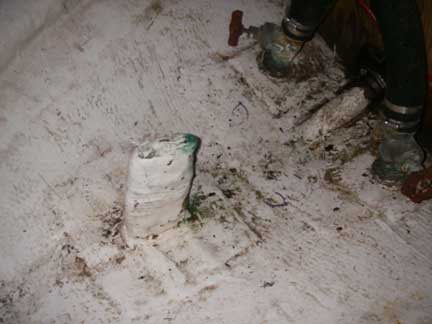
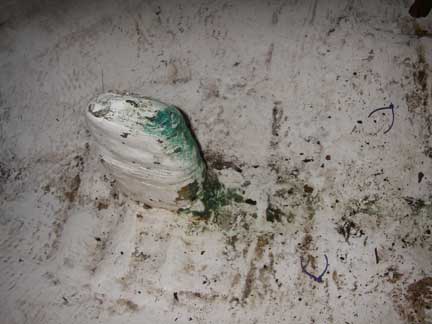
The green stuff is presumably copper that has been leached from the bronze of the strut. I'm not sure whether I've got to take this all apart and re-build it, or whether just re-doing the bedding and fairing outside where the strut joins the hull will be sufficient:
I've been struggling with the shaft coupler. The set screws that tighten it onto the shaft are rusted in place. If I can't free them, I will cut them off, and then drill them out. Then hopefully I'll be able to get the coupler off the shaft, so I can slide the shaft out in order to replace the hose connecting the stuffing-box to the shaft log. (Alternatively, I suppose I could pull the engine and transmission out, something under contemplation for other reasons anyways...)
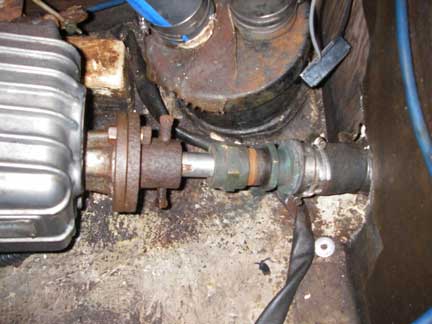
Note that the propellor came off the shaft without any fuss at all and the cutlass bearing slid out of the strut with just finger pressure after loosening the set screws. I will be sending the propellor back to Martec for re-furbishing.
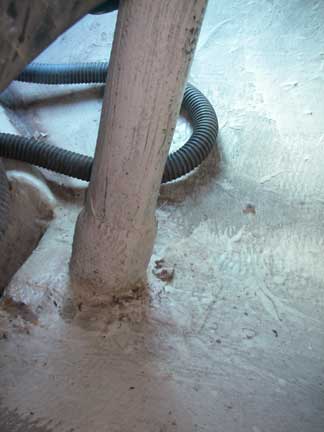
The spade rudder is "wet." I don't really want to take it all apart -- although maybe I should to check the web for crevice corrosion -- but probably should at least attempt to dry it out somehow. In the mean-time, I was curious about the condition of the shaft and bearings. I had to take the tiller head off the rudder shaft anyway, so I dropped the rudder partway:

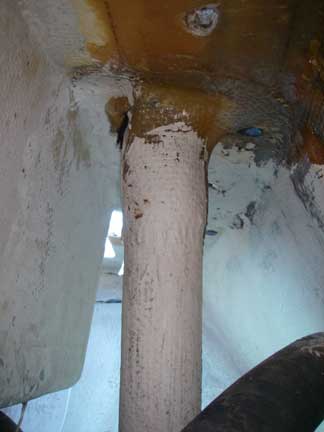
Close-up of
Rudder Shaft where it goes into the rudder.
The shaft is supported in the boat by a solid fiberglass tube from hull to deck. The "bearings" appear to be just plastic shims between the shaft and tube.
Do I really want to try putting in new bearings? ....
Boatyard | Greyhawk | latest | next | 2006-10 | previous | oldest
website by thorpeallen.net
January 2010