Boatyard | Greyhawk | latest | next | 2008-05 | previous | oldest
GREYHAWK's Refit - Continued
May 2008 Update
In the last full update (January 2008), I reported on installing most of the deck hardware, but even at that writing there was still a lot of hardware to put back on. None of it is particularly photogenic, though.
Holding Tank and Head Plumbing
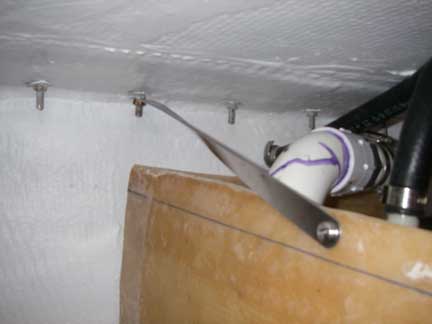
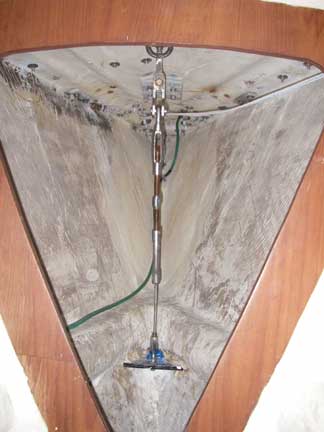
I had left off on the January Update with a teaser about the head compartment. I had previously relocated the thru-hulls[ for the toilet intake and discharge, and planned to construct a holding tank from recycled fiberglass panels taken from the MOB Horseshoe Buoy storage "wells" that I removed from the deck. I decided that the back wall of the tank should be form-fitted to the hull to maximize tank volume, so I taped waxed paper to the hull interior and laminated the tank wall in place out of roving and epoxy resin.
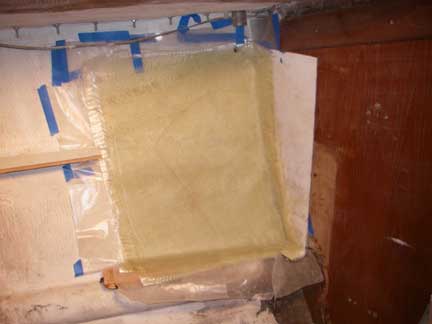
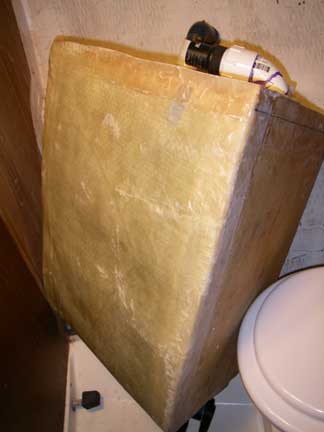
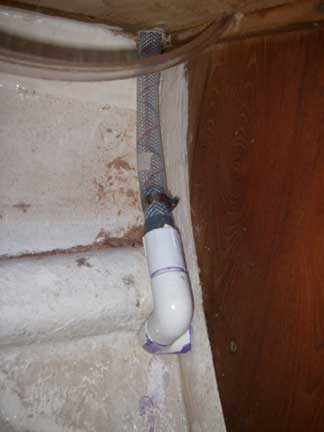
The top of the tank is recessed about an inch below the top of the tank walls, creating a flange that was used to secure the tank to the bulkhead, and which will contain any leaks from any of the fittings. These include (from left to right) the pump-out dip tube, vent, access/view port, and inlet fitting.
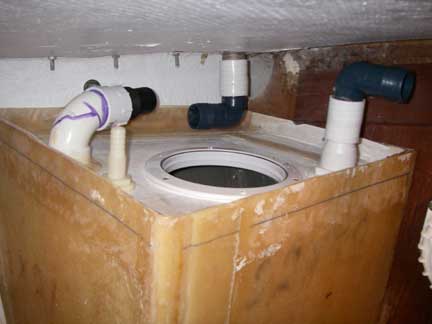
Access/View Port? Why would anyone want to see into their holding tank? But I believe the regs require some means of monitoring the tank level -- with a clear insert screwed into the access port, I can shine a flashlight and see just how full the tank is (or isn't).
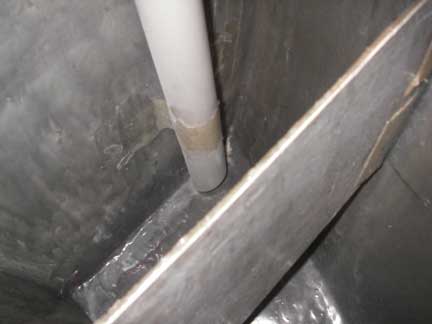
Here's a view into the tank, where you can see the pump-out dip-tube tabbed to the side of the tank, and the internal baffle that I installed. I had bought some WEST Barrier Coat additive so used that to coat the insides of the tank.
I mounted the Pump for my Lavac Popular toilet as high as I could so that there would be little waste standing in the plumbing. Besides being bolted to the bulkhead through the top flange, the tank is also resting on one of the longitudinal hull stringers, and I've added a tie-rod connecting the tank flange to on of the toe-rail bolts. The tank will also be constrained by the cabinetry when that gets installed.

I went with a KISS-type system where the bottom of the tank sits just above the waterline and drains through the bottom to the discharge thru-hull. On my installation, I have a valve at the bottom of the tank as well as the seacock on the thru-hull. I know a lot of folks are wary of fittings on the bottoms of tanks, especially toilet waste holding tanks, but these fittings are the same fittings we use on the bottoms of our hull to keep the sea out. Anyway, I can tell you from experience so far that the system works really well!
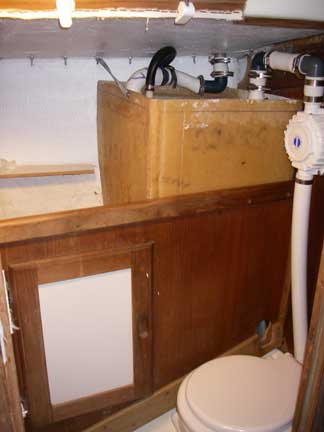
I did get a crude counter top in place and installed the wash basin, but no pics yet... The basin drains into the head intake (with a shutoff valve), so one can flush the head with freshwater if desired.
Other Plumbing
An offshore boat such as this needs to have two manual bilge pumps, one operable from above decks, the other from below, both with all hatches closed. The boat came with two manual bilge pumps, but the below-deck pump had not been plumbed overboard -- you would have had to have a hatch open in order to throw the outlet hose outside. I prefer to have bilge pump outlets discharge aft, so I had a run of about 18 feet to make. PVC pipe is a lot cheaper than marine hose, so that is what I used (with some bits of hose along the way to make a few interconnections).
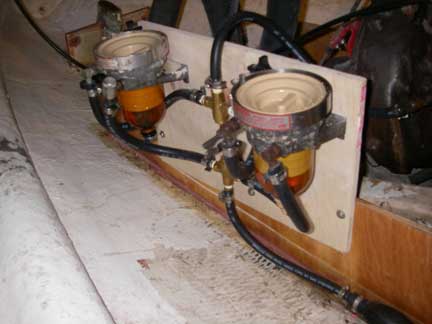
And here's yet another "plumbing" project: fuel filters in parallel with valves for changing over from one to the other without stopping:
Battery Boxes and Electrical System
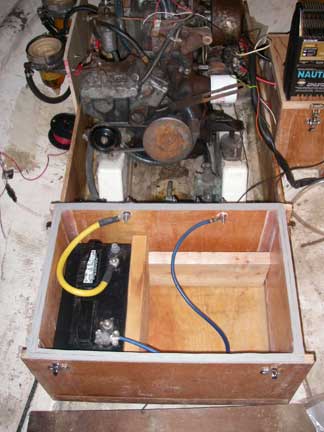
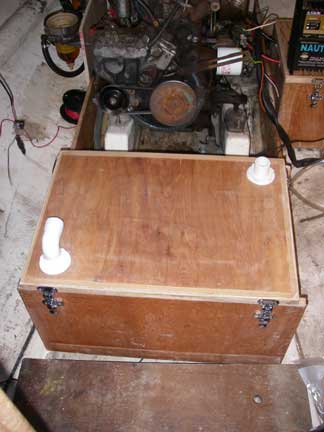
I built two fiberglass-sheathed plywood battery boxes, one for the house battery bank and one for the separate dedicated starter battery. The house box was designed to hold four Golf Cart batteries, but could also accommodate up to 3 Group-27 batteries. At the moment, I've only got on Group-27 battery in there. The house box was located at the base of the companionway ladder, just ahead of the engine and just aft of the keel, just above the bottom of the boat -- optimal placement for locating the weight of the batteries, but also makes the batteries more subject to the possibility of being inundated should we be taking on water. So I made the box waterproof. The lid seals to the box with two strips of closed-cell foam weatherstripping, the electrical connections are made with sealed Blue Sea System's Feed Through Connectors. I aslo installed a couple of thru-hull fittings in the lid for connecting ventilation hoses ("snorkles"). The box is securely screwed through exterior flanges to the floors and is also constrained by the enging box foundations and the companionway ladder. The lid is clamped down with four anti-rattle door latches -- a much better arrangement than the flimsly strap the boat came with!
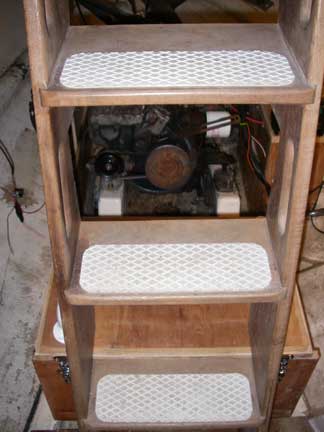
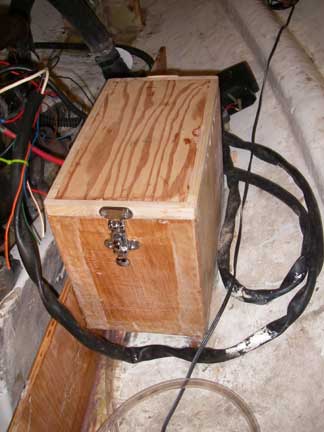
I built a separate battery box for the dedicated start battery, which is located right next to the starter motor to keep the wiring as short as possible. This box accommodates a Group-27 battery. It is not waterproof, but it is located bit higher than the house box. The box is epoxied to the engine box foundation and the hull, and when I get a chance I may add some tabbing. Again, the lid is secured with anti-rattle door latches.

I have not yet added any emergency cross-over wiring for starting the engine from the house bank or for running house loads from the start battery, but that could be done in the future.
The electrical system consists of a main distribution bus (un-switched), the existing "Master Control Panel" with six circuit breakers and a master on-off switch (what used to be the old "Off-1-both-2" battery switch), a distribution fuse box fed from the master panel, and a switch panel for those loads that don't have their own built-in on-off switches (such as the navigation lights), fed from the master panel and the fuse box. All charging sources are directed to the house batteries; the start battery is kept topped up by a Xantrex Digital Echo Charge device. The state of the house battery is monitored by a Xantrex Battery Monitor or XBM. There's nothing special to report about the charging sources as for now I'm just using the stock alternator on the engine and a small solar panel. Installing a shore-power system and upgrading the alternator and its regulator are planned for sometime in the next year.
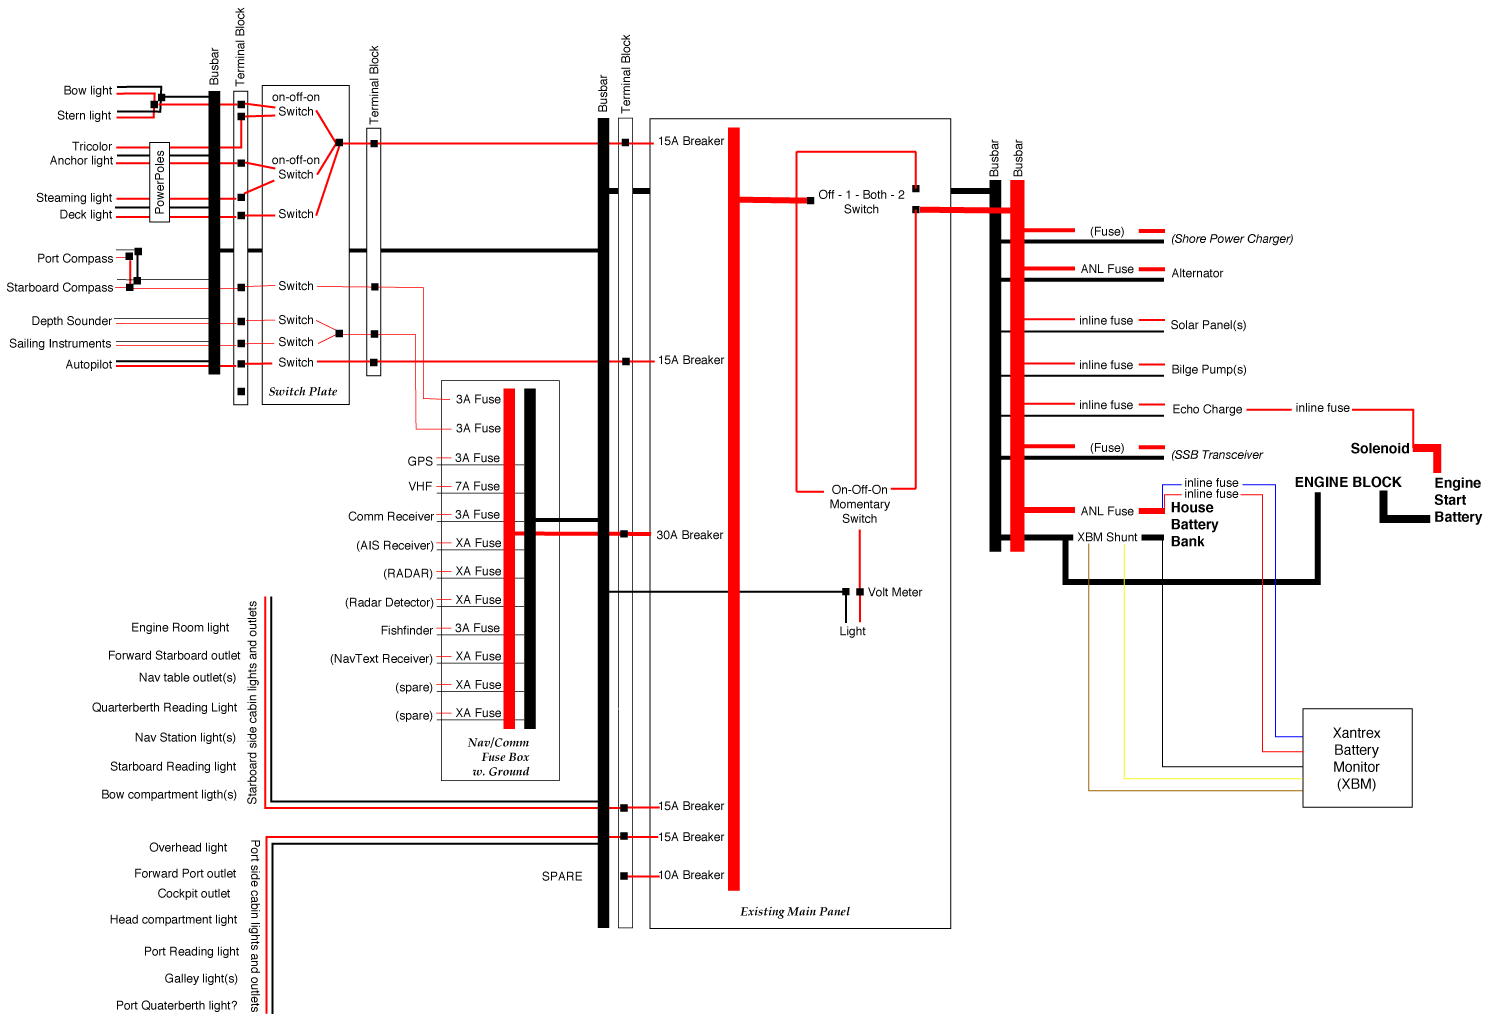
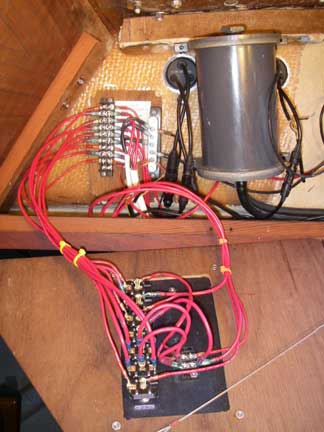
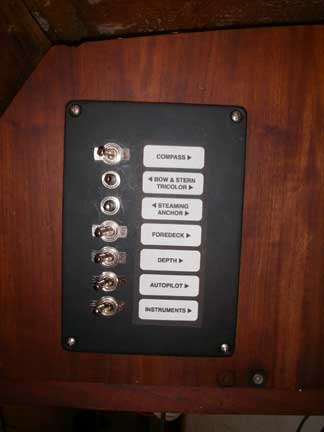
Here's the nav light Switch Panel and it's wiring (the big grey thing is the reservoir for hydraulic fluid for the Navtec Hydraulic Panel for the vang and backstay adjusters). The panel is out of the splash zone of the companionway, but is still accessible from the cockpit.
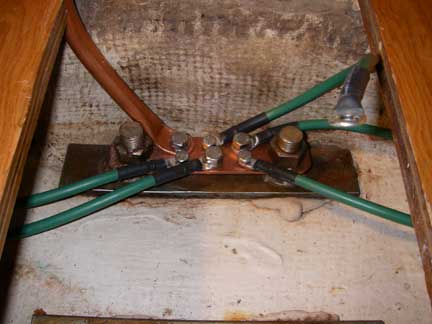
A related system is the Lightning ground. I've got AWG#6 wires leading from the port and starboard chainplates, the stem fitting and bow pulpit, the mast step, and the diesel fuel tank, to a copper bus bar that I fabricated which spans two of the keel bolts under the mast step. The keel itself, 5000 pounds of lead in an external fin, serves as the ground plate. I also plan to bond the mast itself into this system with a piece of copper tubing as a conductor.
I'll try to get some more pictures of the rest of the electrical installation the next time I'm on the boat.
Rigging
One of the unfinished items in a previous update was the tie-rod that backs up the inner forestay. To anchor the tie-rod, I fabricated a triangular-shaped piece of 3/8" aluminum plate which spans the longitudianl stringers where they meet at the bow. A slot milled in the middle of this plate accepts the marine eye on the end of the tie rod. A 3" long piece of 1/2" stainless steel rod passes through this eye on the underside of the plate, transferring the load from the tie rod to the plate and to the hull stringers. The whole assembly was epoxied into place.

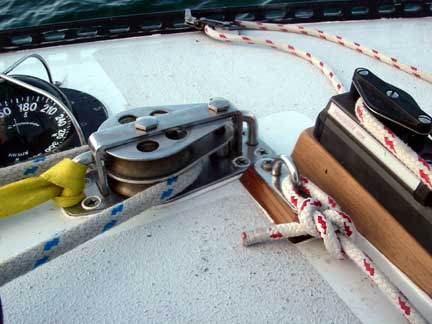
The boat came with some double foot-blocks with 4" sheaves that were not in great shape. New double foot blocks with an equivalent load rating sell for about $750 each! So I decided to rebuild the ones I had. The main thing was to fabricate new divider plates between the upper and lower sheaves. Although the original aluminum dividers were highly corroded and worn, and I contemplated trying some other material like a UHMW plastic, in the end I just made new aluminum plates. The teak blocks supporting the ends of the traveller were also in pretty bad shape, so I made new ones of those as well (laminated from several pieces), re-orienting the lamination to be under compression by the bolts holding the traveller to the deck.
Keel and Bottom
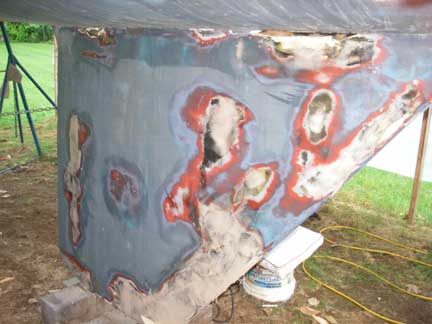
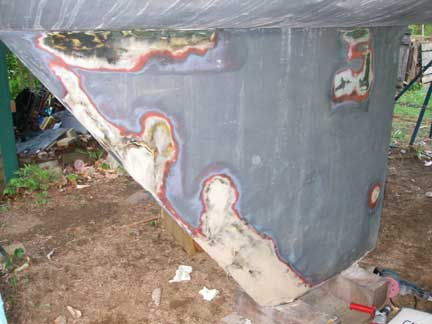
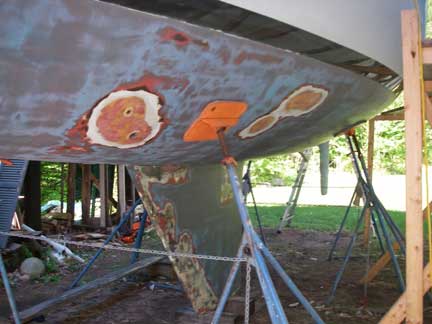
There were a number of spots on the keel where the paint and/or fairing was no longer adhereing to the underlying lead. We ground these areas down to bright metal, wire brushed wet epoxy into the fresh lead, and then re-faired the keel.
I also worked on re-fairing the prop-shaft strut. Inside the boat I added some reinforcement to the strut as well, but I don't seem to have a picture of that; I'll get one next time I'm on the boat.
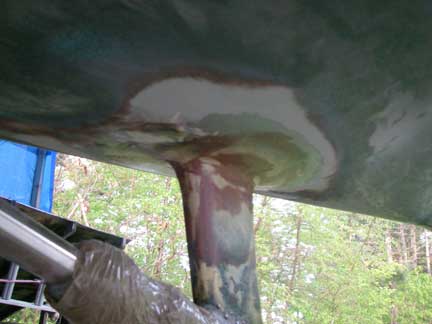
All the faired areas were given another coat of epoxy to serve as a barrier. Then I vacuum sanded the entire bottom with 220 grit and washed all residual dust off in preparation for bottom painting.
The bottom had been painted with VC Offshore, and the boat came with an un-opened gallon of the stuff, so that is what I used. The previous owner told me that he would put on a coat of red, then wet-sand that until he started to see whatever was underneath. Then he would put on a coat of blue and wet-sand that until he started to see the red. Finally, he would mix the left-over red and blue to make purple (the bottom took about 2/3 of a gallon), roll that on and then wet-sand again -- through 400 grit, followed by burnishing. Indeed the bottom was very smooth. I only put on one coat of blue, rolling it on with a 3/16 mohair roller. Then I wet-sanded with 220, concentrating on the forward 2/3's of the hull, keel, and rudder. That's all I had time for... Now the fun part: I will collect some soil samples from under where the boat was and analyze them in my lab at work for lead an copper content (I'm an environmental geochemist by profession ;).
The goal is, of course, a fair and smooth (fast) bottom. I think we did OK for the first shot at it:
(As an aside, you might remember my prop-shaft saga from February 2007. Last summer I took the old shaft and coupler to H&H Prop in Brunswick, ME, and they supplied with with a new shaft and coupler. I also replaced the cutlass bearing and the stuffing box hose, and re-packed with GFO packing.)
Topsides
We never did do anything to the topsides, other than to give them a good washing. I had hoped to compound and polish the old gelcoat, but just ran out of time. Oh Well! She may not be as shiny as some other yachts out there, but she's still a fine sailing machine!
Launch and Delivery
On Thursday, May 29, my Dad and I went down to Marblehead to work on the mast (which was stored there). We installed some new halyards, additional stays, fixed the steaming light, and installed the Tides Marine Strong Track for the mainsail.
On Friday, May 30, my trucker, Ron Wiswell from Marblehead Trading Company, showed up with his truck and trailer right on schedule at about 8:45, just as I finished taking down my scaffolding alongside the boat. We loaded the boat onto the trailer and were on the road by about 9:15. I rode in the truck with Ron while my Wife and my Dad drove seperately to Boothbay Harbor in order to spot a car there. They would then drive down to Marblehead to meet me there.
While waiting around for the boat to get launched, a fellow introduced himself (although I don't think he ever gave me his name) -- he recognized the boat from my website; he had been following along on the progress of my project as he had bought a boat (a Seidelman 30, if I remember correctly) of similar vintage around the same time I had acquired GREYHAWK.
In the afternoon, the boat was launched and the mast was stepped despite some misgivings by the yard master/crane operator about our state of readiness (or lack thereof). Wendy and my Dad showed up around 17:00, we went out to dinner, and then spent the night tied to the float in Marblehead while we finished rigging the boat and organizing all the stuff that had been loaded on at the last minute.
This is the
scariest part for me -- when the boat is balanced on three stands while
the trailer is being backed under her!
We got underway just before 09:000 on Saturday, May 31, to a call of "good luck!" from the yard master. The forecast called for relatively big winds and seas that night, but they would be from behind us so the apparent wind would be less. We motored slowly out of Marblehead harbor, past all the Transat Class 40 yachts, raised our sails and got under way. Out around Cape Ann the winds were blowing at 25+ knots, and the seas were running 6 to 10 feet. We were really moving along, often surfing at speeds topping 10 knots. The forecast said the conditions wouldn't get any worse, but also that they wouldn't get any better until early Sunday morning. Normally, I would have sailed on, but I was pretty tired from the long run-up preparing for the re-launch (e.g. I was up until 04:00 Thursday night loading stuff onto the boat) and my crew didn't relish the idea of surfing through the dark night, so we put in at the Isles of Shoals for the night, picking up a mooring there at about 16:00. We got underway again about 05:45 on Sunday, June 1.
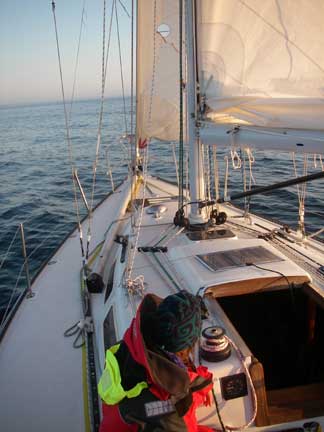
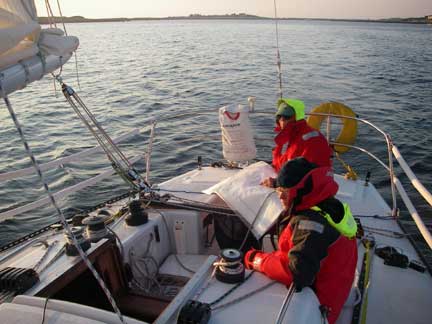
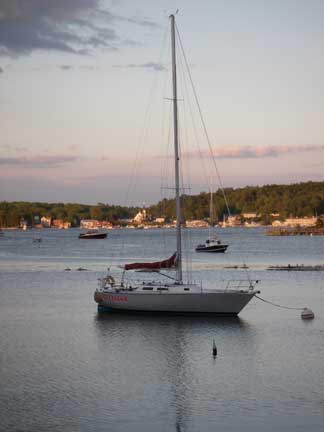
We were running before southwest winds of 10 to 15 knots and seas of 2 to 4 feet all day, arriving in Boothbay Harbor around 19:00 that evening. There's still a lot to do, but it feels great to have her back in the water and sailing again! Wahoo!!!!!
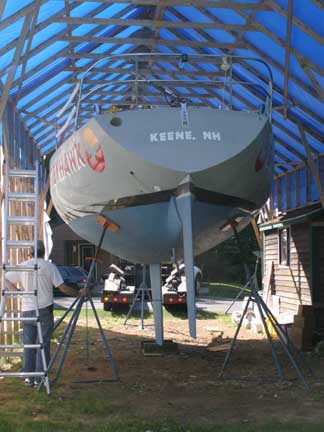
One of the next projects will be dismantling this tent now that it's empty. Man, is it ever cavernous!
![]()