Boatyard | Greyhawk | latest | next | 2008-01 | previous | oldest
GREYHAWK's Refit - Continued
January 2008 Update
In the last full update (October 2007), I had just completed painting the decks (primer, "skid," and non-skid paints). Since then, I've been installing deck hardware (including overhauling of much of that hardware).
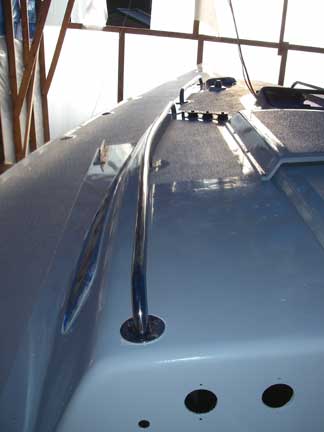
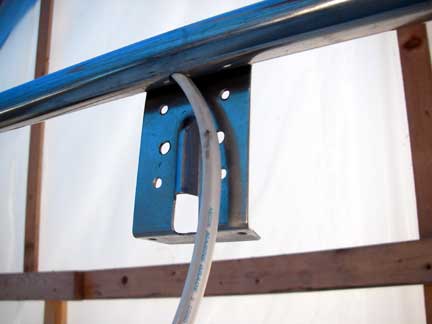
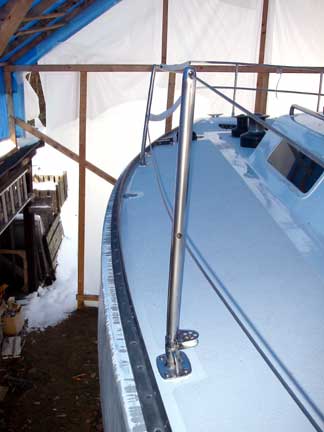
In October, I mentioned the nifty bends I put in the stainless steel handrails and promised some pictures once they were installed. Here they are:

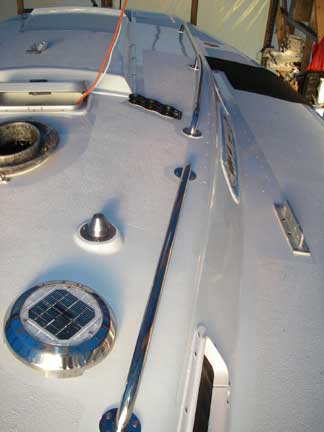
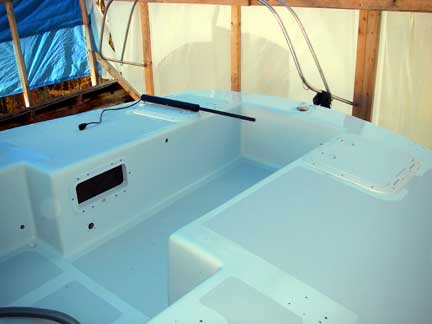
And some other shots showing installation of hatches, ports, etc...
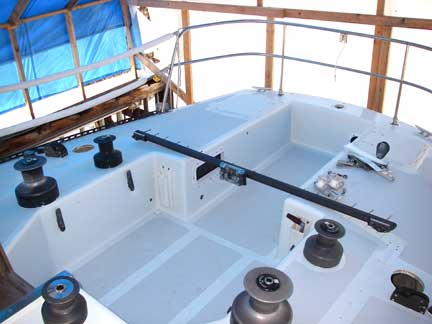
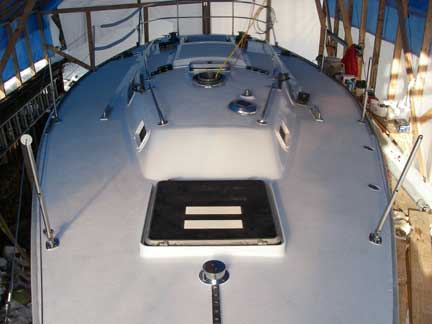
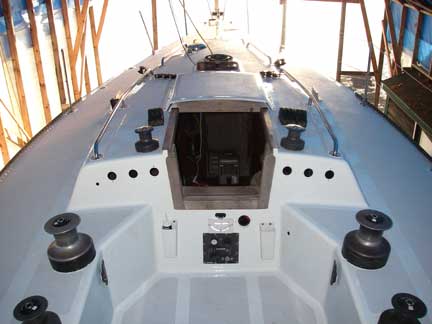
Looking forward from the cockpit:
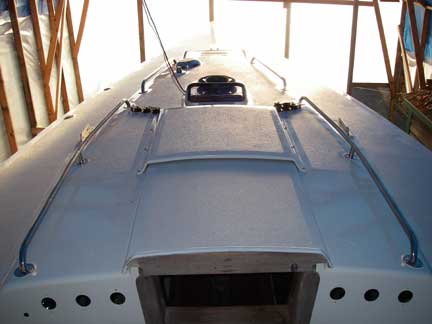
Looking aft from the bow:

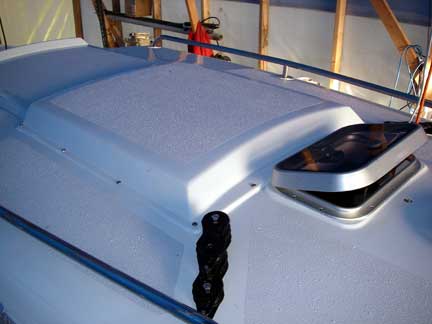
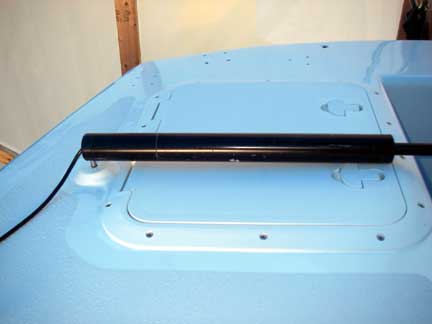
Detail of Sea Hood and new ventilation hatch:
View of the back of the cockpit showing lazarette Hatches installed as well as the portlight to the quarterberth:
Detail of tillerpilot arm over lazarette hatch:
I was recently asked about my choice of metal rails versus the more traditional wooden hand rails, so here's my thinking on that: I haven't had my boat in the water since installing the stainless handrails, so I can't really comment on how well they work "under fire" as it were. But so far I do like them a lot. A handrail needs to be convenient to access and grab, and needs to be able to support the the load of a falling body. The wood rails, with their multiple loops, mean that you can't just grab them anywhere -- the metal rails are continuous and virtually un-interupted. The 25-year-old wood rails that I removed were cracked and worn, and I just didn't have a lot of confidence in their ability to hold me in a serious fall. I could have replaced them with new teak rails, but those would have been even more expensive than the metal rails. Another reason I chose metal over wood is that it is my sense that one reason for the failure of the sealant under wooden fittings is because of the shrinking and swelling of the wood as it's moisture content changes -- not a problem with metal (just have to worry about thermal expansion/contraction). There is an aesthetic issue, though. My boat didn't have a lot of exterior wood to begin with, and set up as a racing boat, has more of an industrial "sailing machine" look about it. The metal handrails fit with that look pretty well. For a more traditional cruising boat with a lot of other exterior wood trim, wooden hand rails make a lot of sense. If they are properly maintained, they should remain strong enough and shouldn't ever leak (proper maintenance would include re-bedding them occasionally, maybe in ten years?). FWIW, I will have a set of wooden handrails on the underside of the cabin roof for interior use...
One of the big projects in late November was overhauling the ten winches that came off of the boat (six #30's, two #44's, and two #55's).It was quite a job, as they were pretty loaded with lots of dirty grease and other gunk. I went through about 5 gallons of old diesel fuel as a solvent to clean all the innards. By the way, the number designations don't just refer to the winches' power ratios, but also represents the number of bits and pieces inside each one! ;-)
My general procedure was to soak the whole winch in a bucket of oil to soften up the old grease, disassemble the winch and scrub each of the pieces in the oil with a toothbrush, dental pick, etc..., then scrub each piece again in fresh clean oil to wash off the dirty greasey oil left from the first scrubbing, dry each piece with paper towels and/or newspaper, then wash each piece with hot water and dish soap in the kitchen sink, dry them again, and finally apply a very thin coating of fresh grease (oil on the pawls and springs) while re-assembling -- which is assuming that I could remember how to put all the pieces back together again (The 30's were easy, but for the 44s and 55s, I only did one winch at a time, so that I had it's pair still assembled to look at if I had any questions).
I only re-installed six of the ten winches, as I'm using spinlock rope clutches so that all the halyards can share a pair of winches rather than having a dedicated winch for each halyard.

I had to do some machining on the anchor roller assembling before installation, but here it is along with the rest of the fore-deck hardware:
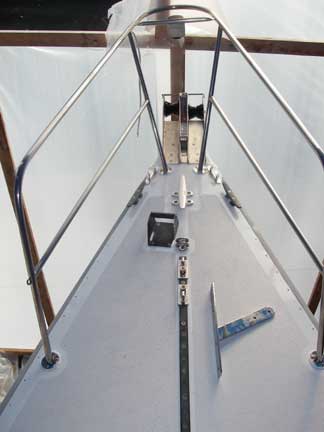
The piece of metalwork laying on the starboard side is the stem piece and headstay chainplate, which I have yet to install. It comes up between the two channels of the anchor roller assembly, and there are a couple of bolt holes that need to match up. After my first attempt at drilling them, they didn't match up... So I've still got a bit of work to do there.
Next to the spinnaker pole chock, just ahead of the foredeck track, is a double folding padeye that is the attachment point for an inner forestay. Below deck, it is backed up by a tie-rod that will help transfer the load to the hull.
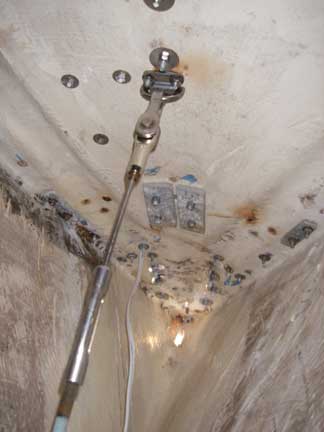
You can also see the backing plates for the three foredeck cleats, and the hole through which the headstay chainplate goes. The wire goes up into the bow pulpit and up to the bi-color running light hung.
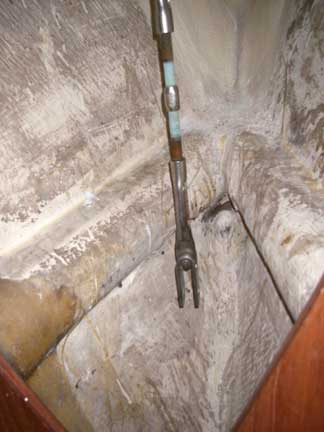
The base of the tie rod will fasten where the longitudinal hull stringers meet in the forepeak. I still have to fabricate the fitting for that... (waiting for another shipment from onlinemetals.com)
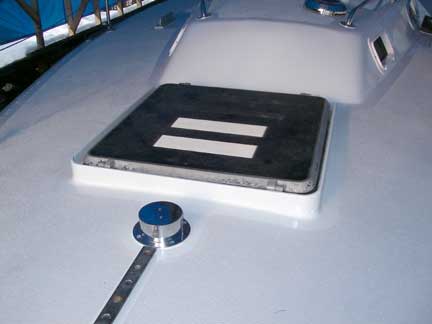
I located the anchor rode deck pipe just forward of the foredeck hatch, because I want to keep the weight of the anchor rode out of the bow as much as possible. You can also see, completed, the Wavestop I constructed around the foredeck hatch.
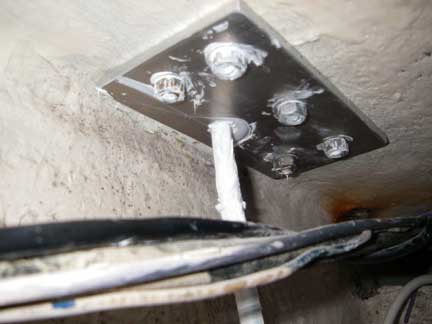
I spent some time polishing the bow and stern pulpits, new stern pulpit bases, and lifeline stanchions and bases, and then re-installing them. You saw the bow pulpit above, here's one of the new bases for the stern pulpit, which replace some cast aluminum fittings that had broken:
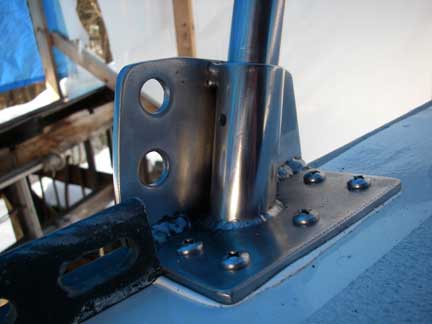
These also serve as attachment points for spinnaker blocks, so they are backed up with aluminum backing plates below deck. The wire going through this one runs up through the stern pulpit to the stern running light.
Most recently, after cleaning all the old caulking off, I started re-installing the toe-rails:
I applied the sealant to the bottom of the rail, and then started inserting the screws from the aft working forward, bending the rail as I went, using clamps (or a line taken to a winch) to help with the bending and to hold the rail in place while I put in the screws. Below decks, a friend was putting nuts on, and then I would hold the screw while he torqued them down. But in bending the rail in place, I did smear some of the sealant... Clean up shouldn't be too bad (I hope). At least I'm not dealing with freshly painted topsides!
So here's some overview pics, looking aft from the Bow, and forward from the stern:
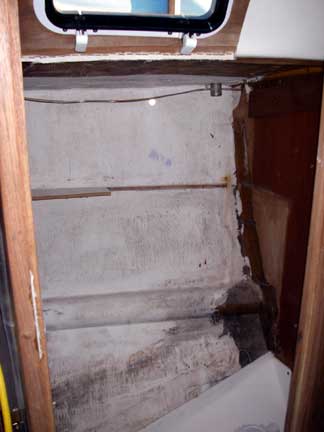
Left to install on deck are two more lengths of toe-rail, the genoa tracks and adjustment system, the jib sheet foot blocks, the main sheet traveller, and a few other miscellaneous items of deck hardware. Then I can turn my attention to the interior, starting with the Head compartment, where I've already done all the "demolition":
BTW, I've made an appointment with my hauler (Marblehead Trading Co.) to have the boat launched and mast stepped on Friday, May 30th, ready or not...